
I haven’t yet figured out which room in the house is my favorite: the craft room or the kitchen? So I really love it when I do something that involves both!
I fondly remember that when I was young (I think I must have been four or five years old) I had an apron made for me with my name on it. It was just a plain natural canvas apron that had been embellished with ladybugs, butterflies, bumblebees, and my name – all with just a marker – but I loved that little apron. There’s just something about putting a child’s name on something that turns an ordinary object into a prized obsession that they’ll remember for the rest of their life. So, it was with this memory that I decided to make one for my little sister as well. One thing I was sure of though; I was NOT going to be doing it freehand! I have absolutely zilch talent when it comes to painting, drawing, or sketching, so there was no way I was going to be doing it that way.
Obviously, it was time for me to try my hand at freezer paper stenciling.
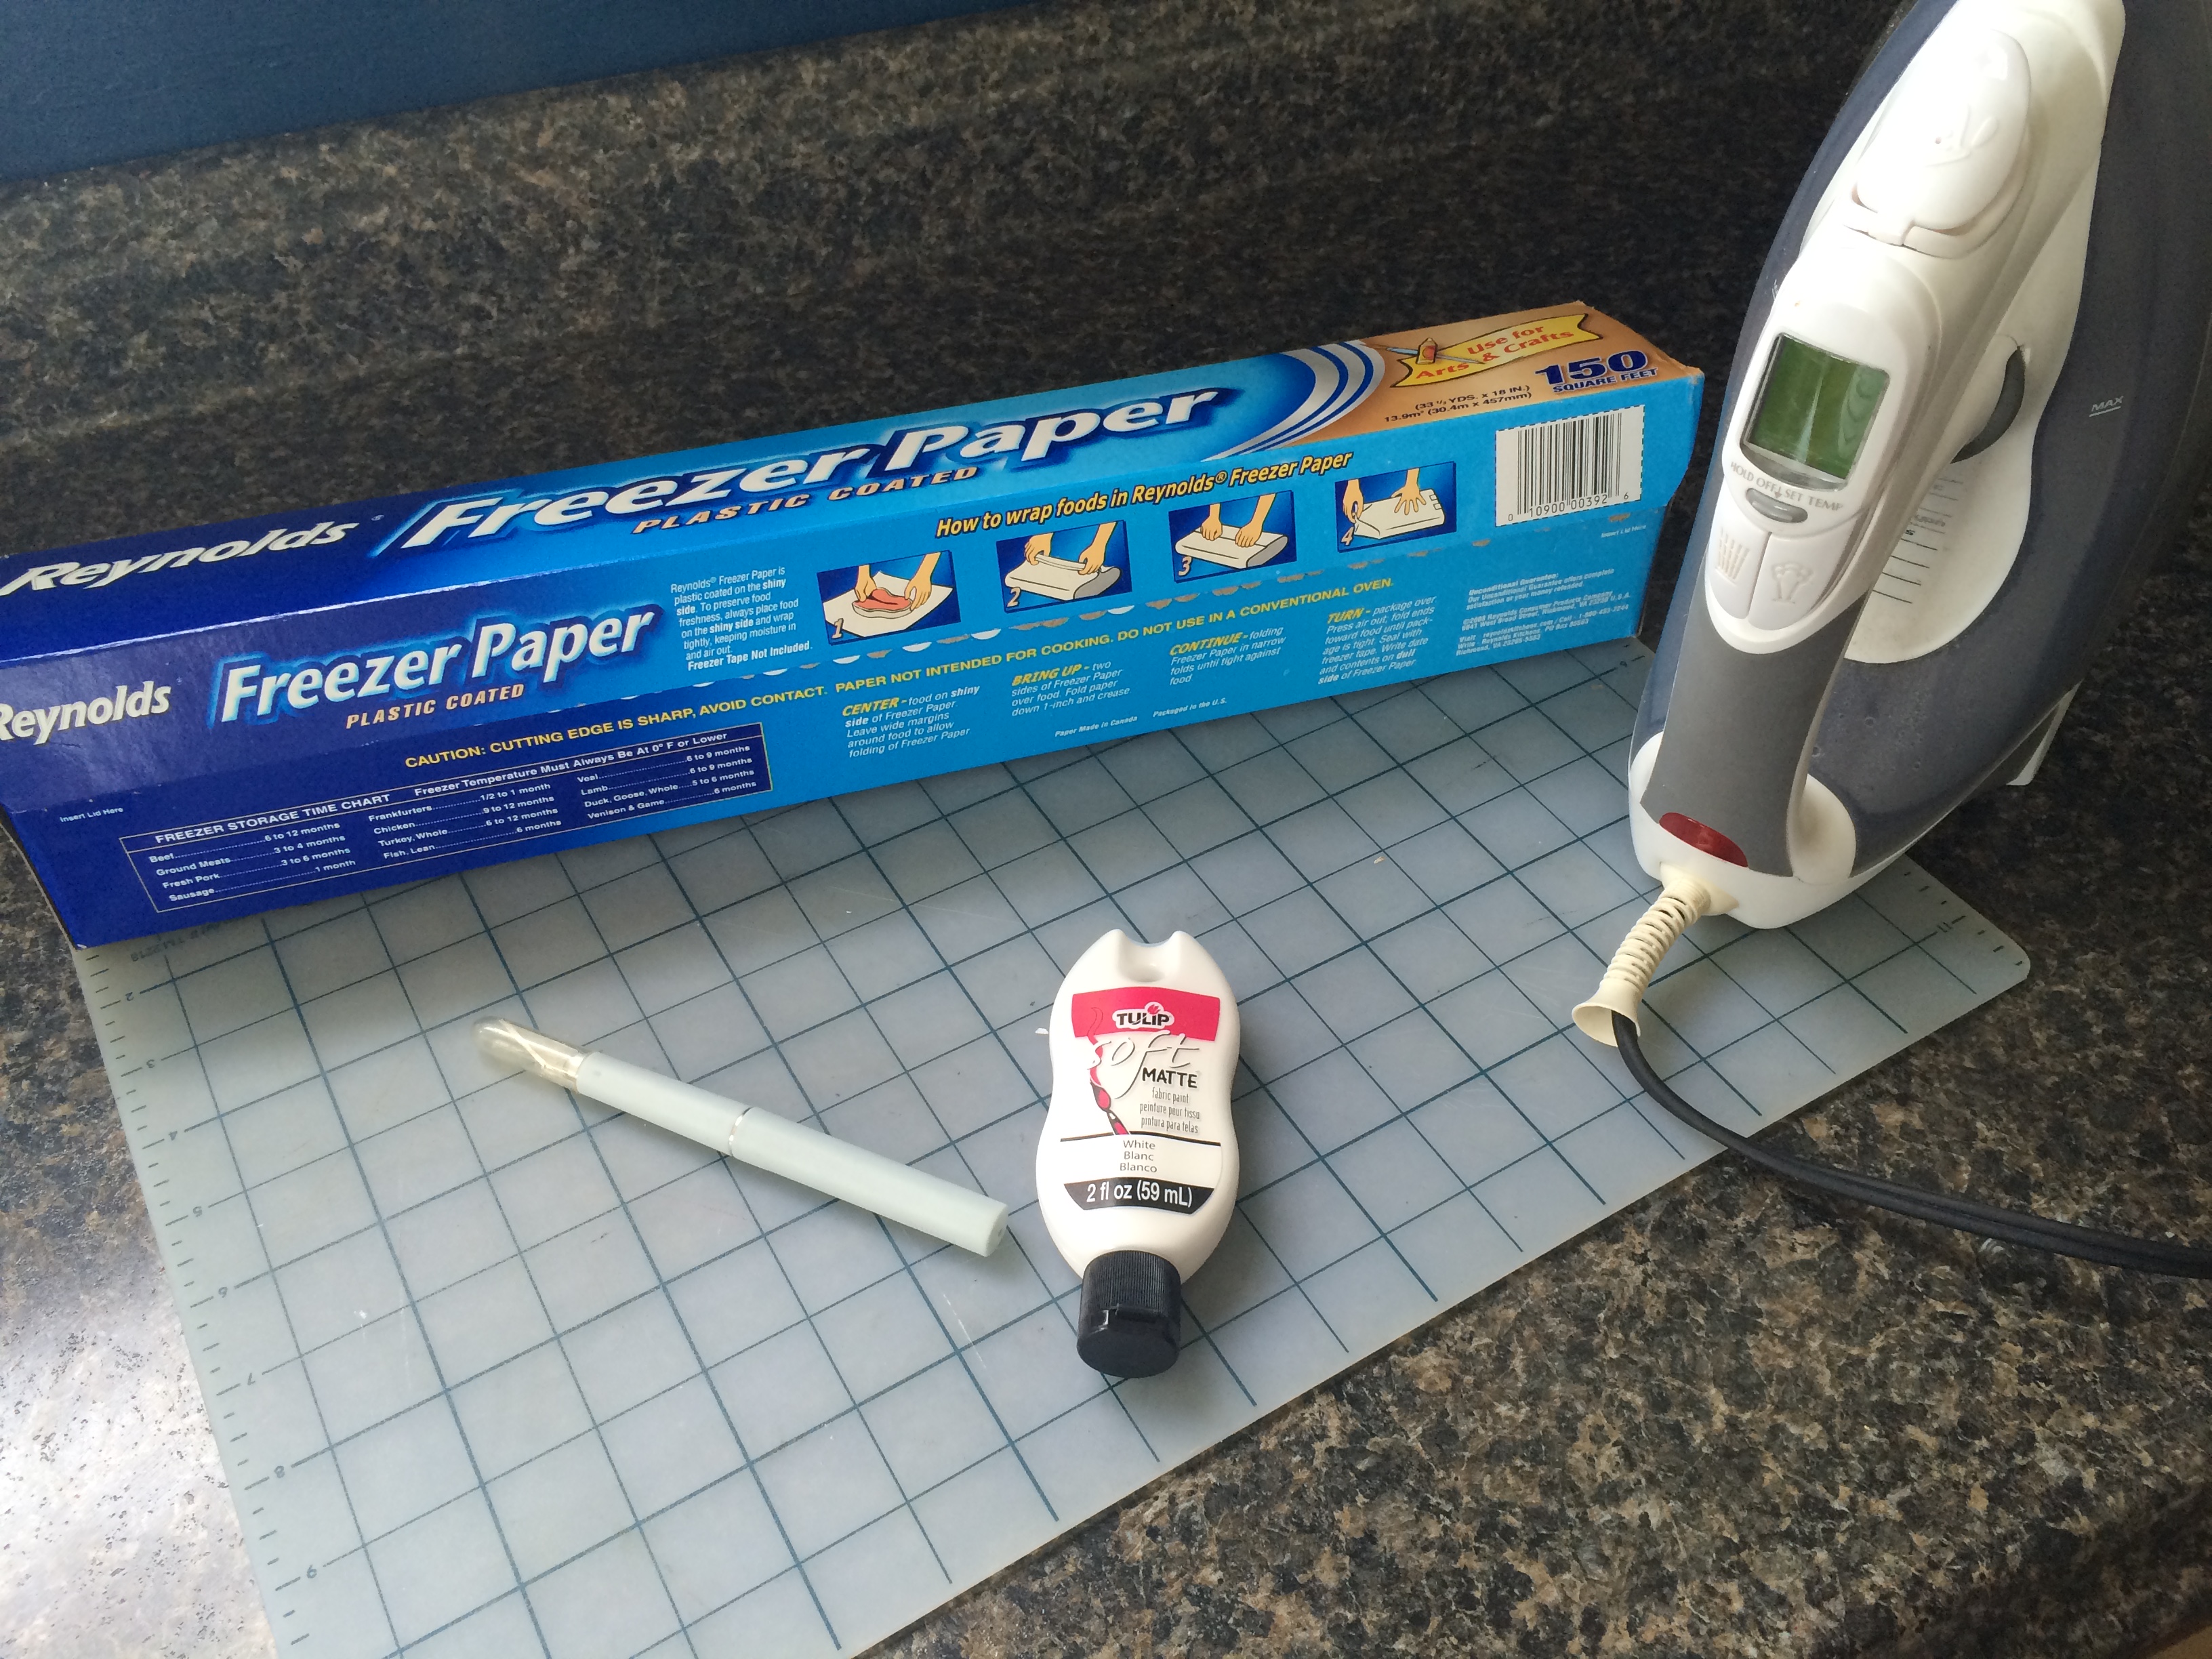
The only supplies that you’ll need are freezer paper, an iron, an x-acto knife, paint, a cutting mat, and a printer.
Also, you’ll obviously need an image too, and something to use the stencil on. For the image, either find the image you want to use or create one of your own, I chose to make my own because I wanted to make mine more personalized. As for what you decide to use the stencil on, the possibilities are endless, anything that is fabric or wood will do.

Make sure that your article is wrinkle-free before you begin. (I didn’t feel like the getting the ironing board out, so I used a doubled over towel. 🙂 )
Next, you’ll need to print out you’r design. When printing it out, I personally found that it made the cutting out process easier when I printed the image (or words) out directly onto the freezer paper. To do that, cut a piece of freezer paper down to the same size as a piece of printer paper and tape the freezer paper to the printer paper with the shiny part of the freezer paper facing towards the printer paper.

Carefully cut out the stencil, remembering that what you’ll need will be the negative space parts. Here, you can see that I originally had planned to have words in my design, but the letters were way too small and I ended up cutting them (pun intended) from my design.


Position your freezer paper stencil where you want it to be and gently place a piece of fabric over it before you iron it onto the fabric.


Take the paint and squeeze a little bit out on the end of a foam brush.


I found that dabbing the paint on actually worked better than brushing it on. I painted one coat on, hoping that that would be enough, but it wasn’t quite. So I waited about an hour to let the paint semi-dry and then painted on the second layer, and that did the trick.

And now comes my favorite part! The grand reveal!!! I’m an impatient sort of person so I did’t wait until it had dried before I peeled the stencil away, but after doing a little test on a separate piece of fabric and letting it dry overnight, I found out that it probably would have been better to wait. Oh well, live and learn…


After I peeled the stencil away, there were a few little places where I hadn’t completely sealed the edges with the iron and a little paint had tried to run away. I wasn’t sure if it would work or not, but I though that maybe I could use nail polish remover to clean up those little places. It worked! To get into the groves of the canvas I dipped a pick into the remover and used it between the groves with a good result.

I called in my model (aka little sister) so that I could so that I could see how it looked so far, and I almost left it like this. It was really cute like this, but there was something inside me revolting against that thought, so I decided to go ahead and put on the additional details I had originally planned on doing.

In the end, I was glad that I went ahead and finished it out.
All it took was a name, initial, and a fabric flower I’d made earlier, and I had really cute apron ready to make some little girl’s day! 🙂
These little aprons make great gifts, and If you don’t have time to make it yourself, I’d love to do the work for you! Just let me know the name you want on it and it’ll be on it’s way! (After I’ve personalized it, that is.) Visit my Etsy shop to learn more!


That’s a really cute idea! People DO love things with their name on them. Great gift idea. Feel free to check out our blog, http://www.twinspiration.co 🙂
LikeLiked by 1 person
I’ll definitely check out your blog! Also, check back tomorrow to see the rest of this post; While working on it I left it up on my computer and I believe one of my younger siblings must have hit “publish”! It wasn’t finished yet! LOL
LikeLiked by 1 person
Haha ok. Will do!
LikeLiked by 1 person
HI Chloe!
LOVE the apron!!! its so cute and such a great gift!
Haviland~
LikeLiked by 1 person